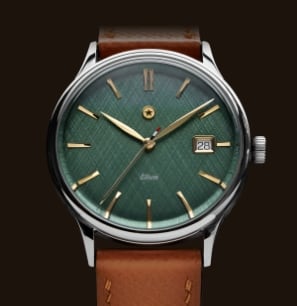


Mechanical watches come spring-loaded with history, so it is no surprise that many connoisseurs gravitate towards the precise engineering which keeps mechanical watches popular today.
For the specialist or antiquarian, pocket watches in particular hold a unique appeal. After studying and collecting enough watches, one might begin to wonder: What if I began to know my watch inside and out?
In the following guide, Jack Mason will explain to the inquisitive horologist how to disassemble your own pocket watch so that it may undergo repair.

Tools You Need Before You Begin
Below is an exhaustive list of tools needed before undergoing any at-home watch repair. In addition to these, a flat, clean surface on which to do your work is also needed, to keep the watch components both clean and protected during what is a very delicate procedure.
Essential Tools
-
Watchmakers screwdriver set: If nothing else, buy a watchmakers screwdriver set, and be sure to purchase one specifically made for watches, as opposed to an eyeglass repair kit.
Without a set of screwdrivers precision-made for watch repair, one risks scratching or damaging the screws or other internal mechanisms, which in turn affects the value, appearance, and in extreme cases, functionality of the piece.
-
Parts tray: Specialized parts trays for watch components exist, though in a pinch, an inexpensive tackle box or segmented, solid pencil case may work as well.
The important thing is to not place the parts directly on the table you are working on, as this puts the parts at risk of loss if they accidentally get knocked over or roll away.
-
Tweezers: A simple set of tweezers are used to remove parts and then set them in place once more. Any pair will do in a pinch, though watchmaking tweezers do exist.
-
Hands Puller/Pusher: These tools exist to remove the hands of a watch without damaging the dial and then place the hands back on when maintenance has been completed.
- Loupe: This eyepiece is a small magnifying glass used by jewelers and watchmakers to examine small things, such as the machinery in watches.
Optional Tools
-
Oil and oiler: To keep the watch and parts lubricated, special oil is needed. The oiler is a thin piece of wire either dipped in the oil, which is then applied to the parts, or else designed to administer a single drop of oil whenever contact is made with a part.
-
Cleaning Supplies: For those truly serious about entering the world of pocket watch repair, investing in a parts cleaner and fluid is essential. It should be noted that the cleaning supplies run more expensive than the other parts on this list and can be dangerous if improperly used.
The solvents in question were not designed for casual in-home use. As such, if you elect to use them, you must be sure to protect yourself from breathing in fumes, work in a well-ventilated space, and avoid any direct contact with the materials.
-
Blower: The blower is a tool that pushes air onto watch parts, helping them to dry more readily. The blower does not push spit, which may be contained in small parts when you physically blow on parts.
- Watch paper: This last tool is the easiest to create an at-home replacement for. Watch paper is used to place drying parts, though any lint-less, absorbent paper would make a good substitute.
A Warning
Watches are delicate machinery. In the next section, we will be explaining both common watch problems, as well as how to repair them. We do not advise you to attempt repairing an antique pocket watch if this is your first try at repair. We also ask you to consider the level of risk you are accepting when you attempt to repair any watch without the direct assistance of a professional watchmaker.
You will most likely cause a small amount of damage to the first pocket watch you repair. This is part of the learning process. We also repeat that if you want to use cleaning fluids, you must show the utmost caution and not expose yourself, children, or pets to the fumes accidentally.
Also: It will be helpful to consult movement diagrams during the process, to take photos of your own piece, as well as to make a note, when making in-depth repairs, of the order in which components are removed. Also, note that many pocket watches vary slightly in construction. The U.S. military released specific watch repair manuals for timepieces used during the time period.
Initial Visual Inspection
The first step in watch repair is to do a visual inspection of your watch components. The goal is to gather as much information as you can before you begin the disassembly process.
First, examine what you can without removing the caseback. Does the case or crystal appear dented or damaged? Are the hinges in working order? Is the dial legible, and are the hands parallel with the dial and moving smoothly?
Finally, when you wind the watch, is there eventually a bit of resistance as the watch winds up? There are numerous guides that exist for watch diagnostics, though we will be focusing on the disassembly process.
Removing the Caseback
In order to examine the interior mechanism of a watch, you will need to open the caseback. There are multiple ways pocket watch case backs are designed to be removed.
Most have either a lip or hinge which you can open with either your fingernail or a case knife. Once the caseback is open, you are ready to examine the movement of the watch.
Unwinding the Watch
Be wary of laying the watch flat on its back at the point, as doing so may damage the hands or dial. The next step in repair is unwinding the watch. Attempting to perform repairs on a wound watch can damage the mechanism, and send the tiny pieces of machinery flying upon removal.
If you have done the previous step, you should now be staring at the movement of your watch. You should eventually notice a tiny metal stopper near a gear which clicks every time a tooth passes over it.
Once you have found this piece, firmly hold the crown, and slowly wind the watch until the stopper pushes out. At this point, use a screwdriver to fully remove the stopper from the rest of the gears.
Gently begin to release the crown, and it should move in the opposite direction you wound it in.
Slowly let it unwind.

Removing the Hands and Dial
In order to remove the hands of the watch, use your hands puller. The hands puller goes against the hand posts, removing them in a cork-like manner. The feet of the hands puller will gently touch the dial, but they are designed to not damage it.
Once the hands have been removed, the dial can be taken off. The dial is attached by small screws on the side of the movement. Remove those, and you can remove the dial. It should come off without force, as forcefully removing the dial can easily damage it.
Under the Dial
In the center of the dial, you should see a small gear, which may have a tiny ring on top of it. This is the “hour wheel” and can be removed with simple tweezers. The center post can also be removed, by gently sliding it out with a set of tweezers, though you may want to leave it in place.
At this point, turn the watch over to work on the movement side, though be careful if the center post has been left intact.
Removing the Bridges
Your next step is going to be to remove the barrel bridge and train bridge. The barrel bridge may have small wheels on top of it: If so, remove them.
Either way, remove the screws holding the bridges in place, making note of the length of the screws and which hole they came from. It is important if the screws differ in length that they go in the hole they were removed from.
Under the barrel bridge, you will notice two small gears. These wind the watch and will fall out if the center post referred to earlier is removed. Because they are difficult to put back, we recommend not removing them unless needed.
Balance Wheel
At the center of your watch is the balance wheel, held in place by the balance cock. Loosen any screws holding these in, then remove the whole segment, keeping them together with tweezers.
Palette Fork and Bridge
The last part to remove resides under the balance wheel and resembles a “T.” It is under an additional bridge. Remove any screws holding the bridge down, then remove both bridge and fork, keeping track of how both were oriented.
Things To Watch Out For
At this point, you have disassembled your first pocket watch. You may now clean and oil parts as needed or mend or replace visibly damaged parts. To reassemble, place the parts in the watch movement in the inverse order that you removed them, taking care to replace them exactly as you placed them.
A secret: Now that you’ve prepared for one watch, you can move on to working on any mechanical or automatic watch you feel comfortable with. You’ve successfully troubleshot one watch.
On to the next one!
Sources:
How to Clean and Oil a Watch: A Beginner's Guide I The Watch Guy
Pocket Watch Repair: How To Fix a Broken Watch I Pocket Watch Database